LetsEncrypt SSL for Wowza frontend & Backend
This tutorial is part 4 of the series and will probably the most popular one. I will guide you throught installation and configuration on how to install and enable a Letsencrypt SSL certificate on your Wowza server for version 4.8.23
Part 4
Although Wowza now supports Streamlock for free, letsencrypt is still highly wanted by the community. Just like my previous post, this setup has to be configured manually. As long as you follow the tutorial it shouldn’t be much of a problem.
Our Goal:
- Succesfully enable and configure Letsencrypt
- Convert our certificate with the letsencrypt converter from Github Robymus
- Run the Streamingenginemanager over SSL on port 8090
- Run the StreamingEngine playback over SSL on port 443
Requirements
- Ubuntu Server with Wowza 4.8.23+2 installed.
- Open TCP ports 80, 443 and 8090 (TCP/IN) in your firewall. We need them to be able to request and validate the SSL certificate.
- A valid DNS name that points to your wowza server.
In case you used the installer from part 1 or part 1.1 of the turorial series, SSL is already pre-configured in the Firewall.
Important
In the next steps i will create the SSL on wowza.vanmarion.nl. Make sure you change this url to your setup.
Step 1 – install Snap and certbot
just follow these commands and run as sudo
# install snap
sudo apt install snapd -y
sudo systemctl enable --now snapd.socket
sudo ln -s /var/lib/snapd/snap /snap

# remove certbot-auto and Certbot packages
sudo apt remove certbot

# install certbot
sudo snap install --classic certbot

# cereate a symlink
sudo ln -s /snap/bin/certbot /usr/bin/certbot
Step 2 – request the SSL certificate
We now will request an SSL certificate for our domainname.
sudo certbot certonly --standalone -d wowza.vanmarion.nl --key-type rsa
Set an emailadress where letsencrypt can send mails to and let you know if the certificate needs renewal.
#Saving debug log to /var/log/letsencrypt/letsencrypt.log
#Enter email address (used for urgent renewal and security notices)
# (Enter 'c' to cancel): <set-email-address>
Answer the next questions with yes and no
#- - - - - - - - - - - - - - - - - - - - - - - - - - - - - - - - - - - - - - - -
#Please read the Terms of Service at
#https://letsencrypt.org/documents/LE-SA-v1.3-September-21-2022.pdf. You must
#agree in order to register with the ACME server. Do you agree?
#- - - - - - - - - - - - - - - - - - - - - - - - - - - - - - - - - - - - - - - -
#(Y)es/(N)o: y

#- - - - - - - - - - - - - - - - - - - - - - - - - - - - - - - - - - - - - - - -
#Would you be willing, once your first certificate is successfully issued, to
#share your email address with the Electronic Frontier Foundation, a founding
#partner of the Let's Encrypt project and the non-profit organization that
#develops Certbot? We'd like to send you email about our work encrypting the web,
#EFF news, campaigns, and ways to support digital freedom.
#- - - - - - - - - - - - - - - - - - - - - - - - - - - - - - - - - - - - - - - -
#(Y)es/(N)o: n
The certificate now gets created. You should see something like this:
#Account registered.
#Requesting a certificate for wowza.vanmarion.nl

#Successfully received certificate.
#Certificate is saved at: /etc/letsencrypt/live/wowza.vanmarion.nl/fullchain.pem
#Key is saved at:         /etc/letsencrypt/live/wowza.vanmarion.nl/privkey.pem
#This certificate expires on 2023-09-17.
#These files will be updated when the certificate renews.
#Certbot has set up a scheduled task to automatically renew this certificate in the background.

#- - - - - - - - - - - - - - - - - - - - - - - - - - - - - - - - - - - - - - - -
#If you like Certbot, please consider supporting our work by:
# * Donating to ISRG / Let's Encrypt:   https://letsencrypt.org/donate
# * Donating to EFF:                    https://eff.org/donate-le
#- - - - - - - - - - - - - - - - - - - - - - - - - - - - - - - - - - - - - - - -
Well done. You have succesfully created the Letsencrypt certificate. Now we will convert the certificate to a JKS format which we need in the next steps
Step 3 – Letsencrypt converter
Follow the next series of commands
#- Convert the SSL certificate so we can use it in Wowza. Letsencrypt converter (creation JKS file).
#- Credits to Robymus: https://github.com/robymus

cd /usr/local/WowzaStreamingEngine/lib
sudo wget https://github.com/robymus/wowza-letsencrypt-converter/releases/download/v0.2/wowza-letsencrypt-converter-0.2.jar
sudo java -jar wowza-letsencrypt-converter-0.2.jar -v /usr/local/WowzaStreamingEngine/conf/ /etc/letsencrypt/live/

# 2 files should have been created. a .jks and a .txt file. Read the txt file and copy the contents in a temporary notepad
Now when read the created jks txt file we see this:
cat /usr/local/WowzaStreamingEngine/conf/jksmap.txt

#example output:
SUB.DOMAIN.EXT={"keyStorePath":"/usr/local/WowzaStreamingEngine/conf/wowza.vanmarion.nl.jks", "keyStorePassword":"secret", "keyStoreType":"JKS"}
Copy this line in a notepad or editor of your choice. We will need this information in the next steps.
Step 4 – Enable SSL module in VHost.xml
We will enable 443 Module by removing the <!– and –> tags around the <HostPort> tag
sudo vi /usr/local/WowzaStreamingEngine/conf/VHost.xml
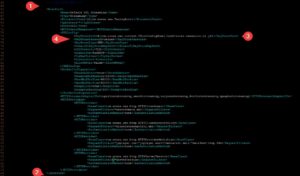
See the image below for the desired setup.
1 and 2: Remove the <!– and –> tags
3 and 4. Only Change only the keyStorePath and keyStorePassword to the ones from the jks file (see step 3). The rest doesn’t have to be changed
Original:
<SSLConfig>
    <KeyStorePath>${com.wowza.wms.context.VHostConfigHome}/conf/keystore.jks</KeyStorePath>
    <KeyStorePassword>[password]</KeyStorePassword>
    <KeyStoreType>JKS</KeyStoreType>
    <DomainToKeyStoreMapPath></DomainToKeyStoreMapPath>
    <SSLProtocol>TLS</SSLProtocol>
    <Algorithm>SunX509</Algorithm>
    <CipherSuites></CipherSuites>
    <Protocols></Protocols>
</SSLConfig>
to:
** make sure to change wowza.vanmarion.nl to your domainname
<SSLConfig>
    <KeyStorePath>${com.wowza.wms.context.VHostConfigHome}/conf/wowza.vanmarion.nl.jks</KeyStorePath>
    <KeyStorePassword>secret</KeyStorePassword>
    <KeyStoreType>JKS</KeyStoreType>
    <DomainToKeyStoreMapPath></DomainToKeyStoreMapPath>
    <SSLProtocol>TLS</SSLProtocol>
    <Algorithm>SunX509</Algorithm>
    <CipherSuites></CipherSuites>
    <Protocols></Protocols>
    <AllowHttp2>false</AllowHttp2>
</SSLConfig>
Note: if you want to see line numbers when you have opened your file just hit
:set number
Now save the file.
Step 5 – Edit tomcat properties
In order to run the Enginemanager on port 8090 change this file and uncomment the first 3 lines
sudo vi /usr/local/WowzaStreamingEngine/manager/conf/tomcat.properties
Result:
httpsPort=8090
httpsKeyStore=/usr/local/WowzaStreamingEngine/conf/wowza.vanmarion.nl.jks
httpsKeyStorePassword=secret
#httpsKeyAlias=[key-alias]
Step 6 – Edit startmgr
The second step is a bit more tricky. We will disable the http port and only allow https port 8090. Open the file startmgr.sh
We will change the second CMD command. Make sure the quotes are at the beginning and end of the line, otherwiser you enginemanager will not start. If you copy the line and replace it, you should be fine.
sudo vi /usr/local/WowzaStreamingEngine/manager/bin/startmgr.sh
:set number

# Change this
CMD="$_EXECJAVA -cp $CLASSPATH $JAVA_SYSTEM_PROPERTIES launch.Main --prefix=/enginemanager --defaultWebApp=/enginemanager --tempDirectory=$WMSMGR_HOME/temp  --webroot=$WMSMGR_HOME/temp --warfile=$WMSMGR_HOME/lib/WMSManager.war --httpPort=8088 --config=$WMSMGR_HOME/conf/tomcat.properties --ajp13Port=-1 --directoryListings=false"

#with this:
CMD="$_EXECJAVA -cp $CLASSPATH $JAVA_SYSTEM_PROPERTIES launch.Main --prefix=/enginemanager --defaultWebApp=/enginemanager --tempDirectory=$WMSMGR_HOME/temp  --webroot=$WMSMGR_HOME/temp --warfile=$WMSMGR_HOME/lib/WMSManager.war --httport=-1 --httpsPort=8090 --httpsKeyStore="/usr/local/WowzaStreamingEngine/conf/wowza.vanmarion.nl.jks" --httpsKeyStorePassword="secret" --config=$WMSMGR_HOME/conf/tomcat.properties --ajp13Port=-1 --directoryListings=false"
Example:
Configuration is now done for SSL.
Step 7 – Restart wozwa services.
sudo service WowzaStreamingEngineManager restart
sudo service WowzaStreamingEngine restart
Now open a browser and login on the Enginemanager over SSL
https://wowza.vanmarion.nl:8090/enginemanager
Your playback stream for example will be like https://wowza.vanmarion.nl:443/live/streamkey/playlist.m3u8
Step 8 – Firewall ports
Port 8088 is no longer needed and you can delete this from the CSF config if you want. Feel free to do that. Open the firewall config by editing the file /etc/csf/csf.conf
and change line 139 and remove port 8088.
TCP_IN = "22,53,80,443,554,1935,8084:8088,8090"

to
TCP_IN = "22,53,80,443,554,1935,8090"
More information about the ports can be found here: Github nlmaca
Then restart CSF by the following commands
# disable CSF
csf -x

# enable CSF
csf -e

# restart CSF
csf -r
In the next tutorial i will explain how to use VideoJS as a free webplayer.
Questions:
If you have any questions or have issues please be specific in which step you run into problems.
Tutorial series
If you want to checkout the other tutorials feel free to read https://vanmarion.nl/blog/blog/updates-wowza-streaming-engine-tutorials/




[…] 4: installation of LetsEncrypt SSL for Wowza frontend & Backend – published june 19 […]
[…] LetsEncrypt SSL for Wowza frontend & Backend […]
[…] LetsEncrypt SSL for Wowza frontend & Backend […]
[…] https://vanmarion.nl/blog/blog/letsencrypt-ssl-for-wowza-frontend-backend/ […]
inferface 8090 not work
443 is ok
I had a doubt about renewing the SSL, whether it is possible to automate it.
Hi Valdo,
this is actually pretty easy.
1. Stop the Wowza services
2. Renew the certificate
3. Restart the Wwoza services again.
And you’re done.
You could automate it, but i wouldn’t prefer it. I rather use planned maintenance for it, because you have to stop the Wowza services for it
# Stop Wowza services

sudo systemctl stop WowzaStreamingEngine

sudo systemctl stop WowzaStreamingEngineManager
# Renew SSL certificate. Change with your SSL domain
sudo certbot certonly --standalone -d wowza.vanmarion.nl --key-type rsa
#start wowza services again
sudo systemctl start WowzaStreamingEngine
sudo systemctl start WowzaStreamingEngineManager
How to setup Loadbalancer on wowza, thanks
Hi, that question has nothing to do with this topic. Load balancing is not that easy to setup and also depends on your hardware, software, network and other infrastructure. For me that is out of scope to explain. Maybe in the future, but not for now. If you want to read more about it you can check the wowza documentation about it at https://www.wowza.com/docs/load-balancing-overview#load-balancing-requirements